May 24, 2013 by Emma

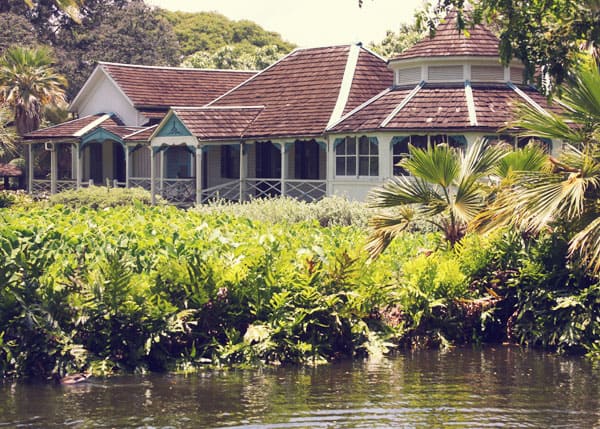
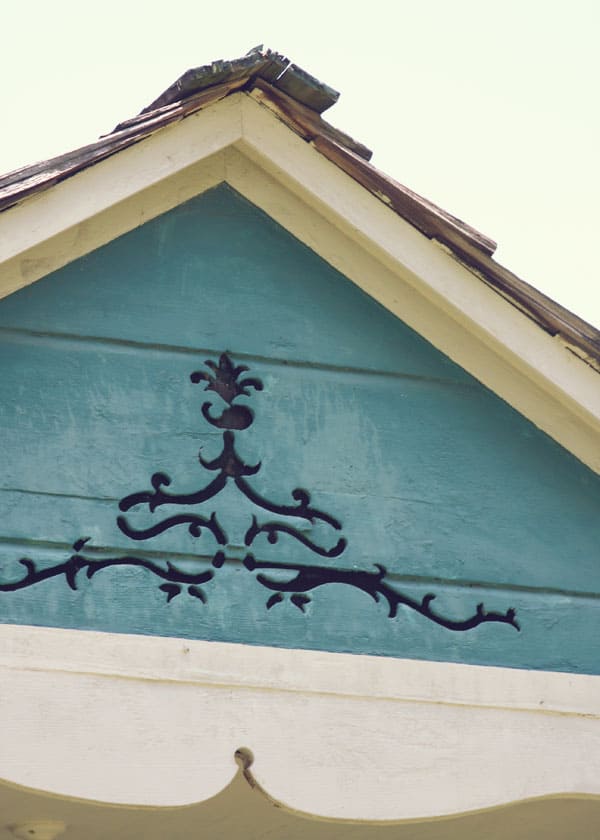
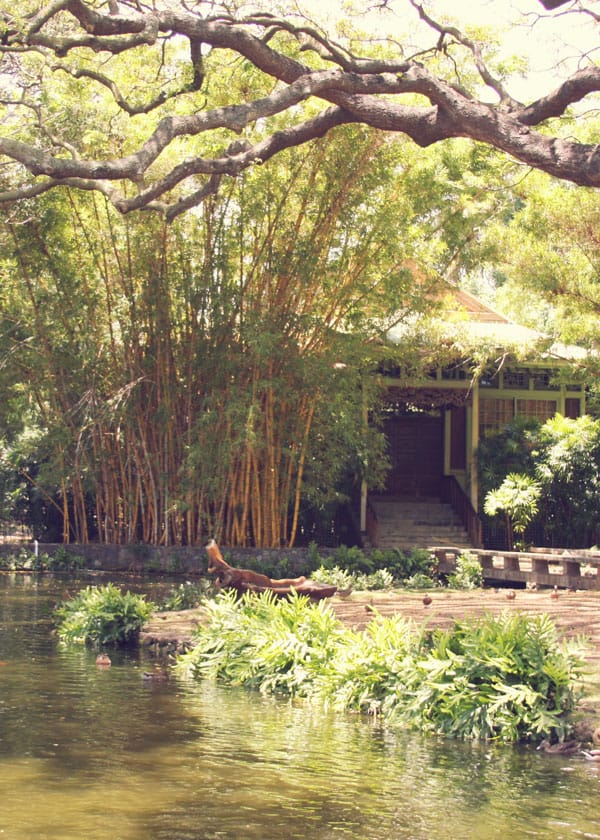
My mom and I went on a lovely picnic the other day. We were already over on the other side of the island so we thought we’d check out Moanalua Gardens which I hadn’t visited since I was little. It’s famous for the massive monkeypod tree, now known as the Hitachi tree. It was bought a couple of years ago by the Japanese company and apparently this has made it quite the tourist destination. As we wandered away from the bus loads of tourists, we stumbled across this fabulous abandoned home. I fell in love with it and was so tempted to ignore the keep out signs. It turns out that it used to be the vacation cottage of King Kamehameha V, so it’s probably best that I didn’t sneak in! I’ve gotten so used to exploring places in Europe that I forget that there are so many interesting places at home too. Do you have any local hideaways that you love to visit?

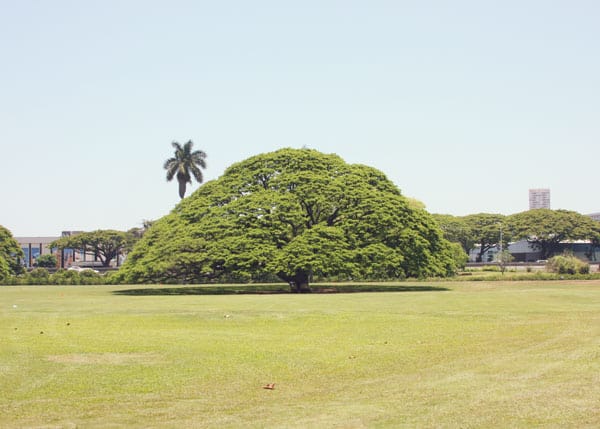
The famous tree!

I’ve been keeping quite busy this summer with two internships and I’ve been loving every minute of it! I’m basically working my dream job with Hawaii Red Style, an online fashion magazine. We’re hoping to launch in the next few weeks! I’ve been doing some writing, photo editing, and assisting with street style shoots. I feel like I’m in the Carrie Diaries (why is this show so addictive?!). I get so stressed every time I get dressed for work, though, as I want to look “fashiony” enough, haha. My other internship is with Social Wahines, a women’s business networking group. I’ve been getting to do some graphic design work and learn the ins and outs of running a business. I’m also working on starting an community event with my boss from Social Wahines– more on that to come! And I’ve been doing some modelling on the side. When I type this all out it does look like rather a lot, but I’ve been enjoying it so much that I can’t complain! What I like best about all these jobs are the interesting and wonderful people I’ve met and work with. And I’ve managed to stay so busy that I don’t miss London too much!


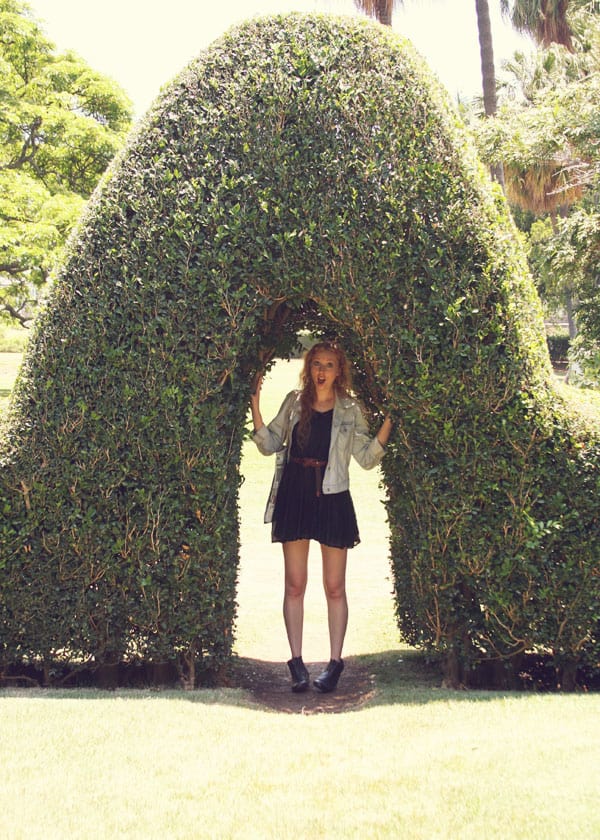
I haven’t a clue why there’s just a topiary chilling in the middle of the park, but I like it :)
Category Hawaii | Tags: | 34 Comments
May 13, 2013 by Emma

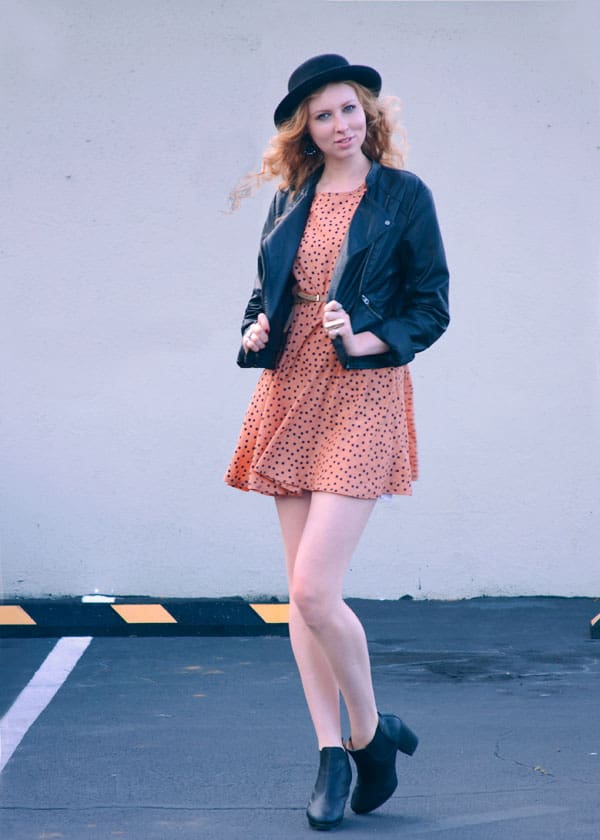
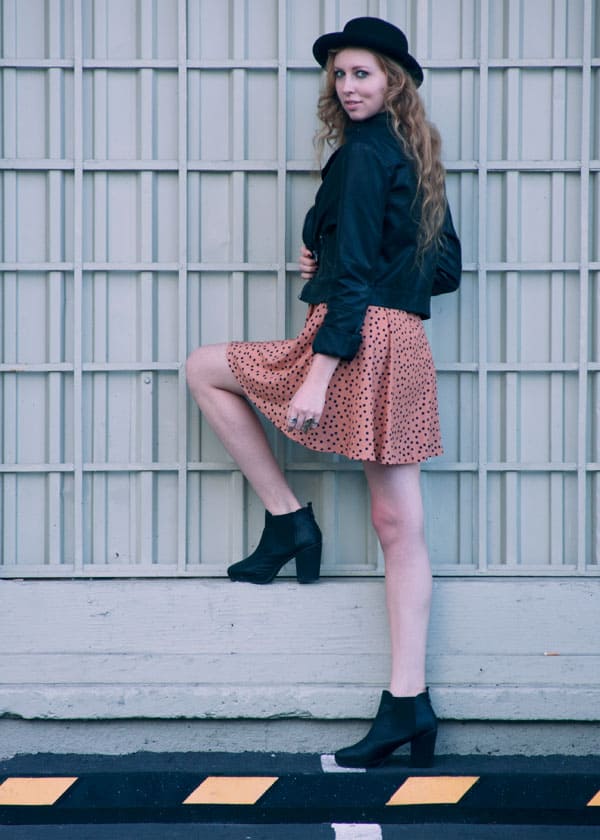
I went to see the new Great Gatsby movie on Friday and absolutely loved it. And because I never miss the opportunity to dress up, I had to wear this 1920s inspired velvet turban that I made earlier this year. I love how it adds a bit of 1920s glamour to a simple all black outfit. Now I can’t compare with Carey Mulligan’s costumes –or her jewels for that matter– but this headband made me feel quite posh while sitting in the theater. It’s really quite easy to make, too!
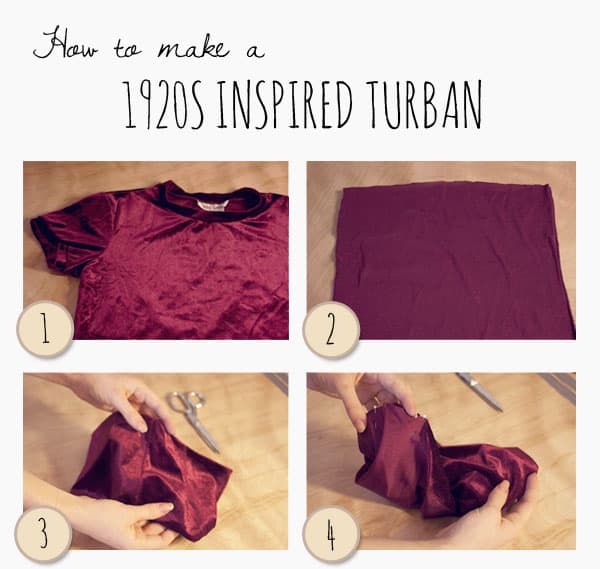
- Gather your fabric– I used this velvet children’s shirt that I thrifted. Make sure that whatever you find is stretchy!
- Next you need to figure out the dimensions of the rectangle you need to cut. Measure the circumference of your head loosely and add 1 1/2 inches to get the long side of your rectangle. Mine was 25″. The short side of the rectangle is 12″. You can make this longer if you want a more gathered look to your turban.
- Sew the short ends of rectangle together to create a tube.
- This is when it’s easy to get messed up, so pay attention to this step! The first time I did it, I managed to sew my turban shut. So, turn the sides of the turban together so that the velvet side is out. Then tuck the raw edges in like how it will be when it is finished. The reason you’re pinning this together is to make sure that you sew the correct sides together! Reach into the turban and begin to turn it inside out, pinning the edges together as you go. You can’t turn it completely inside out because of the nature of the tube. It’s going to look like a bunched up piece of fabric, but this is correct so don’t worry about it! Sew these pinned edges together, leaving a hole of about 2″ so that you can turn it right side out again.
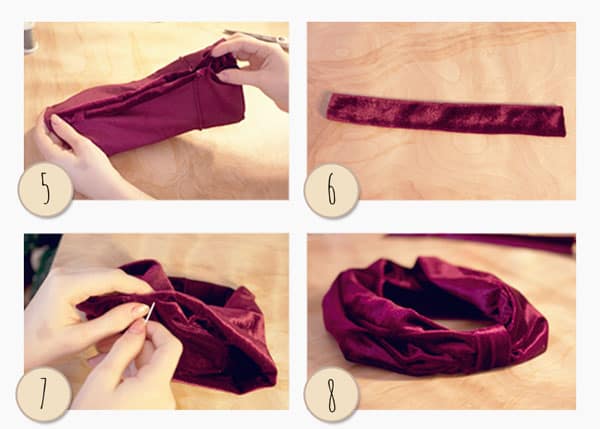 This is what it’ll look like once you’ve sewn your pinned edges together. Flip the turban right side out through the hole that you left.
- Cut an additional piece of fabric measuring 2.5 x 7″. Sew the long sides together and flip right side out.
- Stitch the hole in the turban together by hand.
- Wrap the narrow fabric tube you made earlier around the turban and stitch the two sides together to cinch the turban as tight as you want it. Mine ended up being 4″ in total– so the turban is cinched to 1.5″ tall. Cut the excess fabric of the narrow tube and roll it so the seam is hidden. And you’re done! You can leave the turban as is or decorate it with a brooch or a clip-on earring, like I did.
Category DIY | Tags: | 11 Comments
May 1, 2013 by Emma
Well, I’m back in Hawaii for the Summer! I’m going through London withdrawals, but it is nice to be back home for a bit. The best part about being back has got to be my puppy, although she’s not very puppy-sized any more! I’ve been trying to get a good picture of her, but she’s notoriously camera-shy. And she’s far too wiggly to hold still long enough to focus on. I’ve already managed to get a bit of a sun-burn– clearly I’m not used to sunshine! Other than getting burnt and playing with my mutts, I’ve been busy applying for internships. So far, so good; but more about that later– I wouldn’t want to jinx it!
I got this dress at the Battersea Boot sale a couple of weeks ago in anticipation of spring. Now that I’m back in Hawaii, it finally feels appropriate to wear it. I love wearing clothes that I bought on my travels– a better souvenir, for sure, than something out of a tacky tourist shop. And I’m wearing yet another hat– I can’t seem to get dressed without adding a chapeau. Maybe I’ll make it my signature look?

Category Outfits | Tags: | 14 Comments