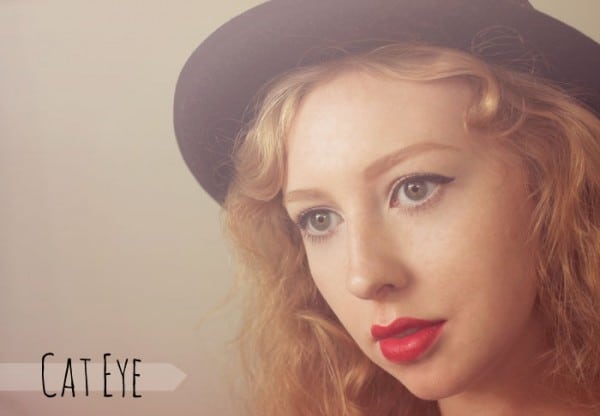
I used to wear my make up like this every single day during my 60s obsession last year– it’s such a fun look! I know that the cat eye look seems difficult, but it’s really not as hard as you might think.
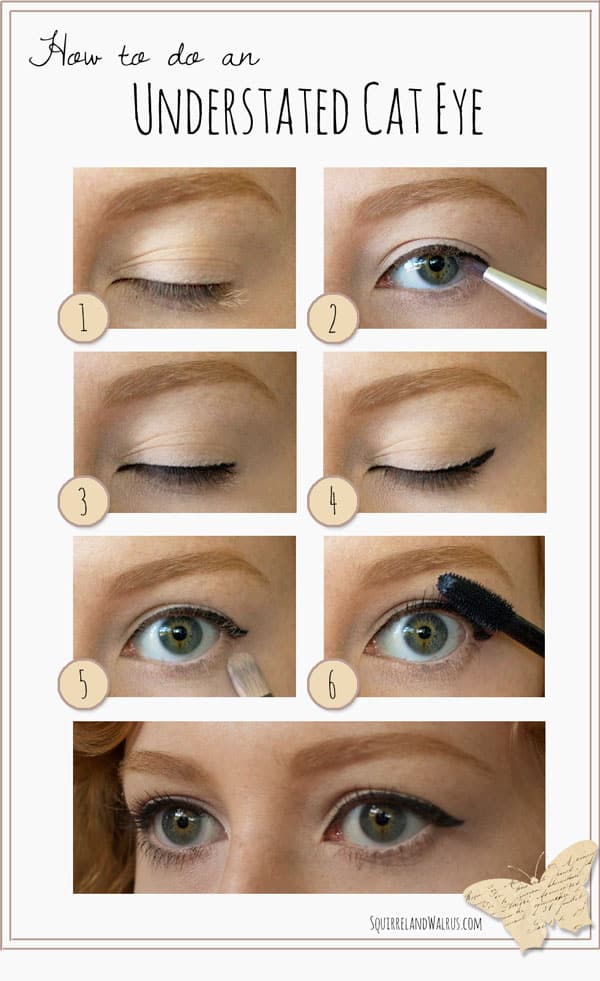
1. Start with a clean base. I like to add a layer of nude eyeshadow primer as it makes the look last longer, but it’s not necessary. Just make sure that there isn’t any left over makeup from the other day. Normally, I’ll do my skin after my eyes to avoid any flakes falling on my skin, but it’s really up to you. (Don’t forget to do your eyebrows though– it makes such a difference!)
2. Starting at the outside corner of your eye, make tiny flicks with your eyeliner brush in the direction of the outer corner of your eye. Continue making these small lines towards the inside of your eye until the top of your eye is completely lined. Try to get as close to the lash line as possible. It’s much easier to do get a clean line with small flicks rather than one brushstroke, and starting at the outside of your eye ensures that you don’t get a big glob of eyeliner at the inside of your eye where your want the line to be a bit thinner.
You can use any type of eyeliner you want, but liquid can sometimes be rather difficult to work with, so I would recommend a gel consistency if you’re new to eyeliner. I like to mix loose eyeshadow with primer in order to create a thick consistency.
3. This is what your eye should look like at this point!
4. Next, you get to do the little cat flick. Extend the line you made earlier at a 45 degree angle, using the same small strokes you did earlier. Experiment with what angle works best for you– I like to follow the upward angle of my lower lid. Next, thicken the areas slightly above and below this line to make more of a triangle.
5. Don’t worry if you mess up! This is the point where you get to fix any mistakes. Using a q-tip dipped in makeup remover, clean up the line you just made. After this, I like to go back with a flat brush and some concealer below the cat eye to really make sure it’s a sharp look.
6. Add mascara! Be sure to get it into the base of the lashes so that they look extra full.
Ta Da! You’re done :)




Very pretty!
Thanks so much!
Love the photo! You look like a doll :)
Thanks :)
Emma!! Your blog is BEAUTIFUL! I cannot believe I found you through CraftGawker. You’re famous now!! Hope you’re doing well and keep up your beautiful work.
P.S. We miss you back here in Hawaii! Hugs!
Ahh, thank you so much! I miss you all in Hawaii too :)
Thank you for sharing this is for sure a good tip. I am trying to follow you on your blog but can’t figure out how.
http://claudiapersi.blogspot.ca/
Claudia
Thanks Claudia! Just click on the bloglovin icon on the right to follow me :)